Set up OnComply with confidence
Follow practical guides for configuring your workspace, inviting your team, and onboarding your first vendors.
The shortest path from signup to your first vendor
Five steps stand between a new workspace and your first vendor invitation. Each one is covered in depth in the walkthroughs below.
Confirm your company profile
Confirm company name and sender branding before inviting vendors, so every email your vendors receive looks like it came from you.
Invite your team
Add internal admins, finance users, ops reviewers, or auditors from Settings, each with the right role.
Create an onboarding group
Create the package vendors will be assigned to. Every vendor joins a group that defines what they must provide.
Add requirements
Open a group and add W-9, COI, ACH, license, contract, or custom form requirements.
Add or import vendors
Invite vendors manually or import them from QuickBooks Online after integrations are configured.
Create your workspace
A workspace takes a few minutes to create. You'll set a password, verify your email, and accept the terms before configuring anything. No credit card is required during the 14-day trial.
Sign up with your company name and work email
Go to the signup page and enter your business name and work email. We create your workspace, activate your 14-day free trial, and email the account owner a secure password setup link. Core compliance features are available during the trial. Branding and Integrations depend on the plan or add-ons you choose when it ends.
Set your password
Open the “Set your password” email and follow the link. Passwords must be 12-72 characters and include an uppercase letter, a lowercase letter, a number, and a special character, with no spaces.
Verify your email
On your first sign-in, OnComply asks you to verify your email address. A 6-digit verification code is sent automatically. Enter it to unlock workspace actions. Until you verify, a banner reminds you that workspace actions are locked.
Accept the terms
Review the terms of service and sign electronically (ESIGN/UETA consent with a typed or drawn signature). After that you land in the Compliance Dashboard, ready to configure.
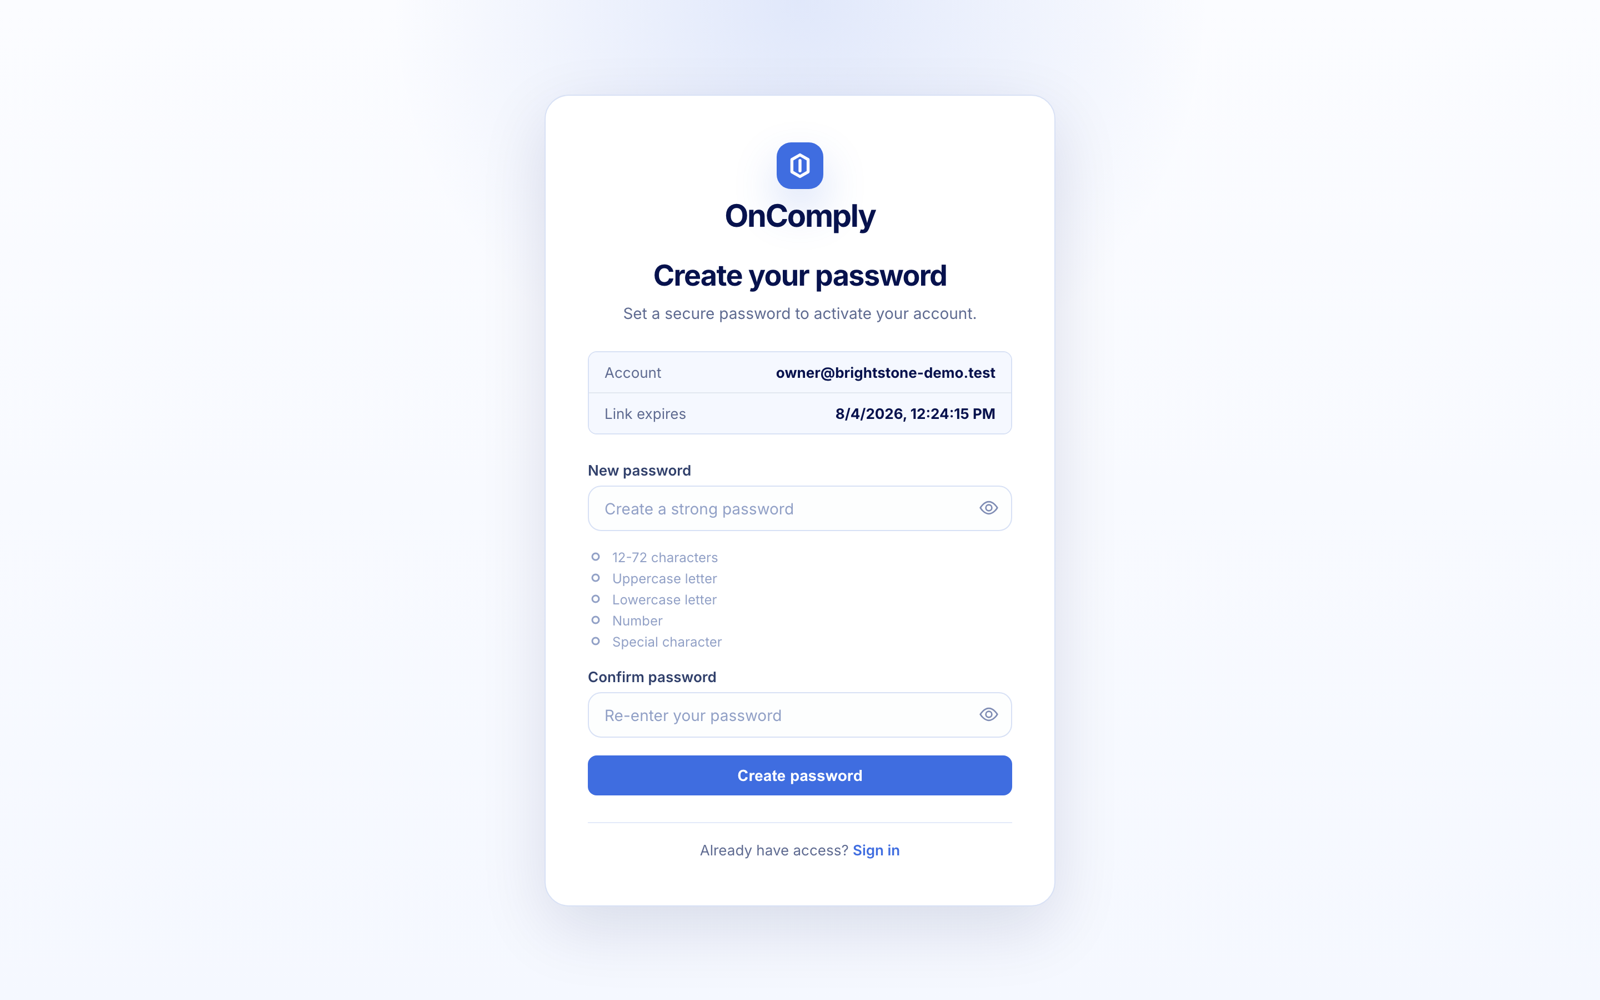
Invite your team with the right roles
Go to Settings → Access to open the Team Directory. Choose Invite Team Member, enter their email, name, and role, and optionally require MFA. Each user receives an email with a secure password setup link.
Owner
Full access. Manages users, billing, subscription, and all settings.
Admin
Settings, integrations, vendor management, and ACH review. Cannot manage users or subscriptions.
Finance
Vendors and documents including ACH and banking data. No settings or integrations access.
Ops
Vendor management, onboarding groups, and manual review. No ACH or settings access.
Auditor
Read-only: vendors, audit log, and exports. Cannot approve or modify anything.
Configure how your workspace behaves
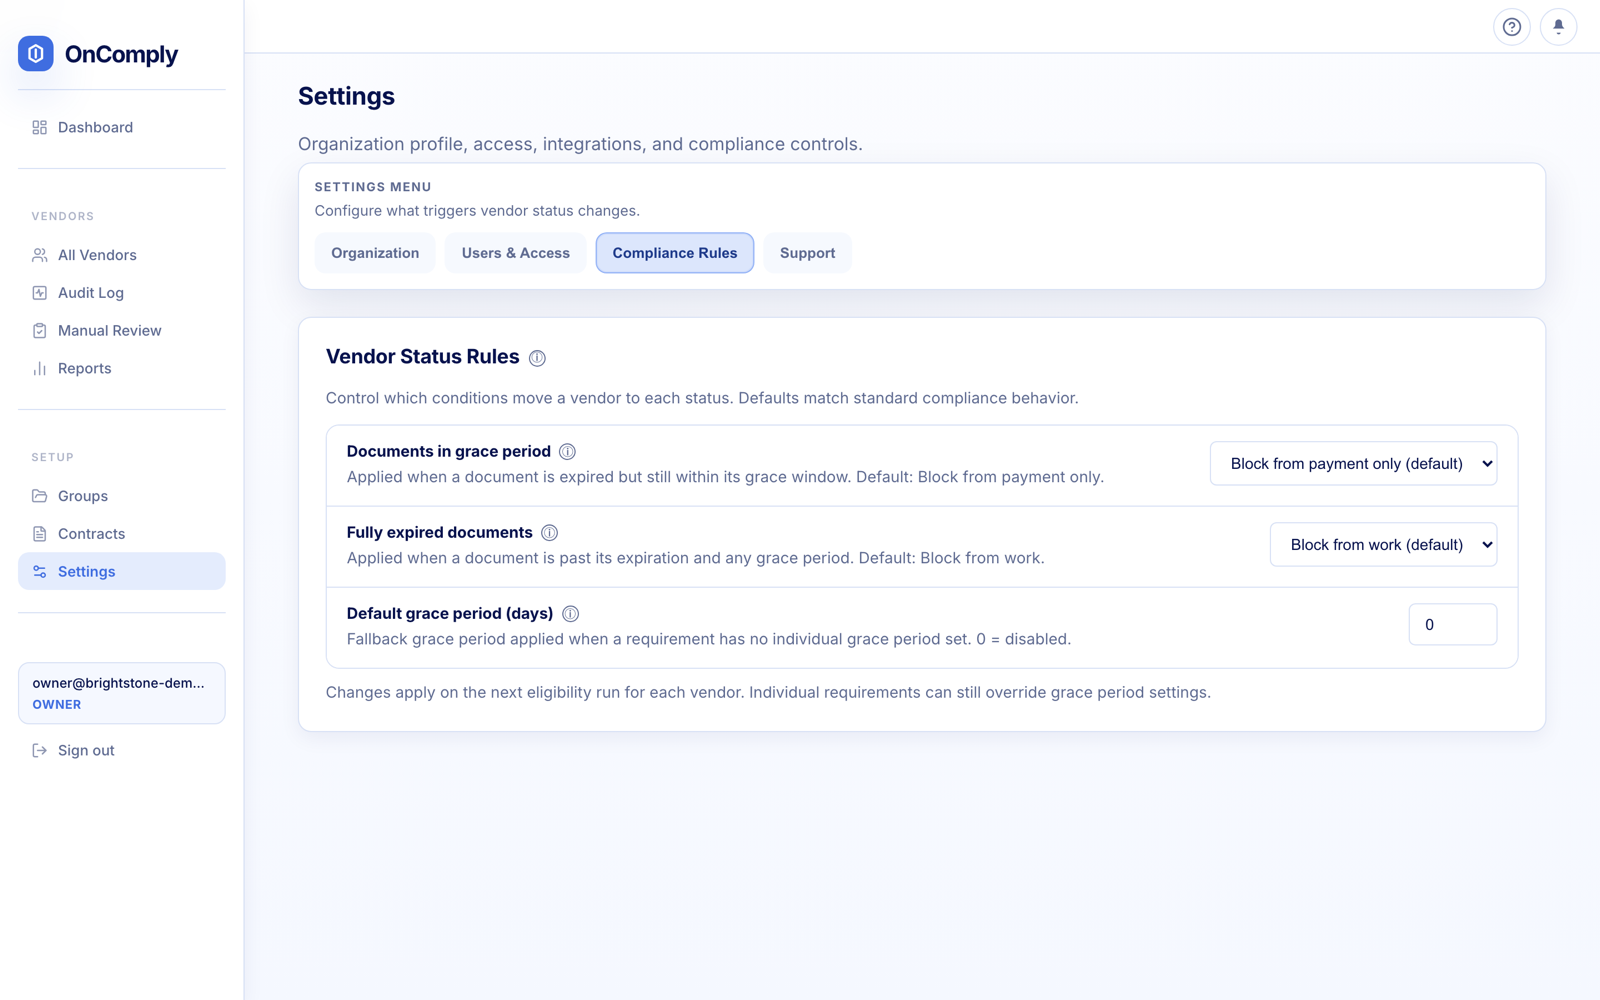
Settings is organized into Organization, Access, Integrations, Compliance, and Support tabs. Two areas are worth configuring before your first vendor invitation: branding and vendor status rules.
Company profile & branding
Under Settings → Organization, set your company name, legal name, and billing email, then upload a logo and set the email sender name. Vendors see your branding in every invitation and in the vendor portal.
Vendor status rules
Under Settings → Compliance, decide what happens when documents lapse: documents in a grace period default to “Block from payment only,” fully expired documents default to “Block from work.” You can also set a default grace period in days. Changes apply on the next eligibility run for each vendor.
Notification emails
Choose which admin events send email: a daily digest, manual-review alerts, and a weekly expiration report. In-app alerts through the notification bell are controlled separately.
Build onboarding groups and requirements
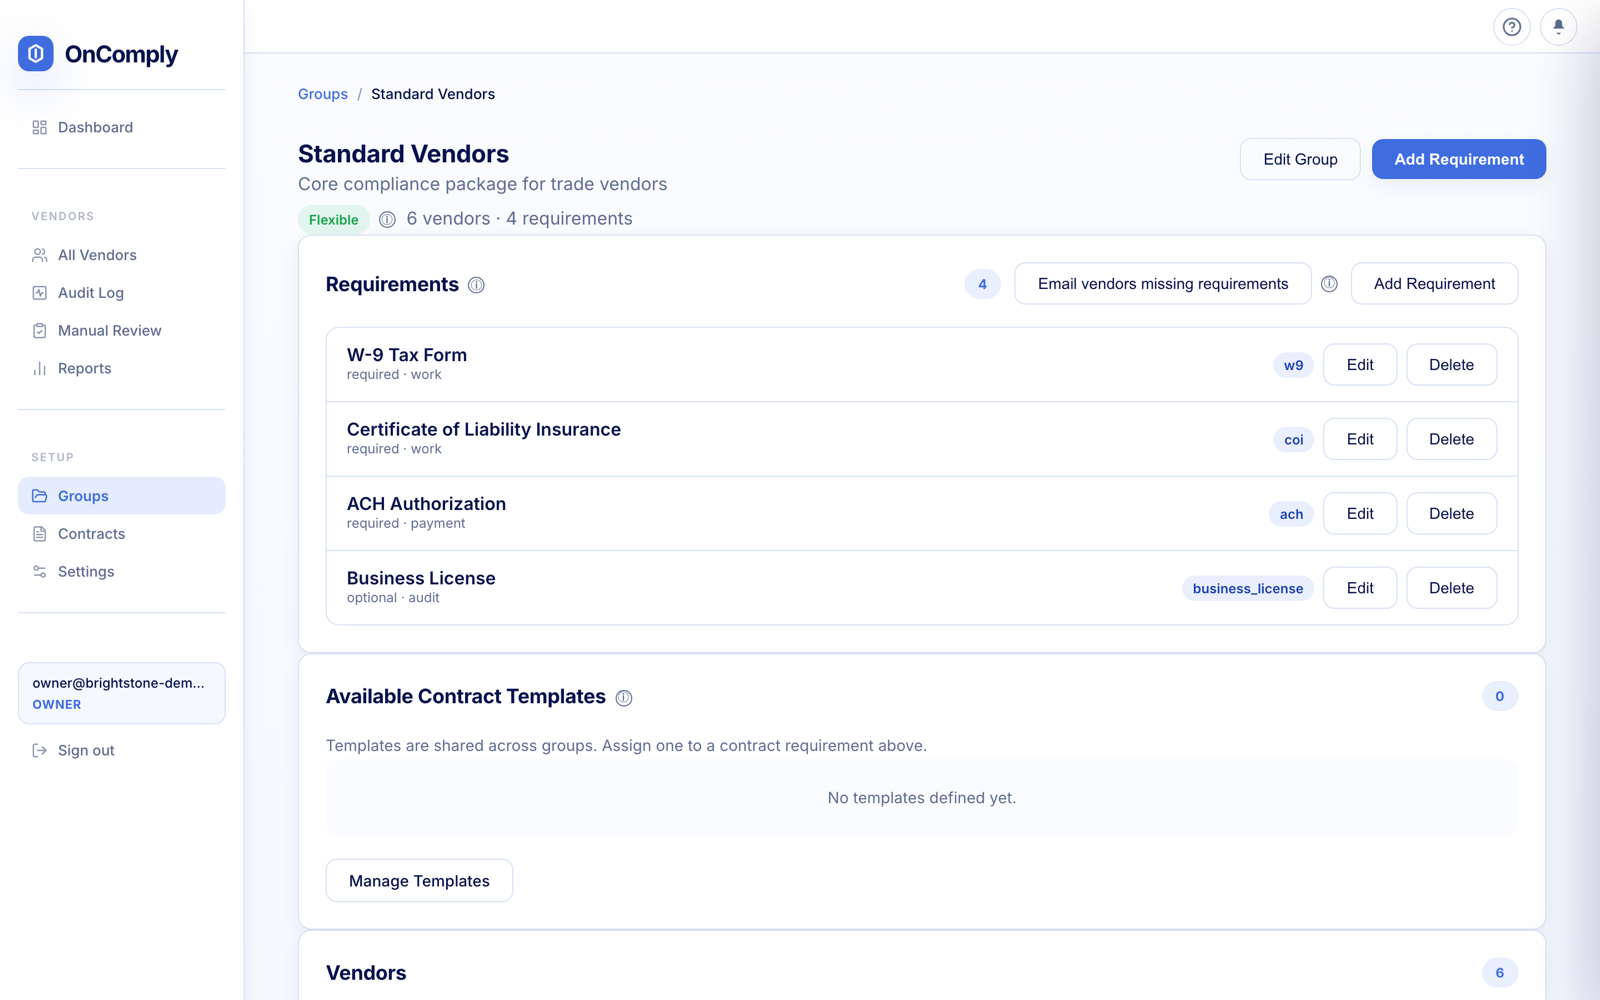
An onboarding group is the compliance profile a vendor is assigned to: the set of requirements, validation rules, and contract templates they must complete. Create one from the Onboarding Groups page.
Create a group
Click Create Group and give it a name like “Standard Vendors” or “Premium Partners.” After creating it, configure blocking behavior on each requirement using its mode and block scope.
Add requirements
Open the group and add what vendors must provide: W-9 Tax Form, Certificate of Liability Insurance (COI), Bank Account / ACH, Business License, Professional License, Tax Exempt Certificate, Vendor Agreement (contract), Business Information, or a Custom Form or Custom Document.
Set the mode and block scope
Each requirement is required or optional, and its block scope decides the consequence: block work (“vendors must provide this to be cleared for work”), block payment, audit-only (won't block work or payment), or none.
Automatic document reading
For document requirements like a COI, OnComply reads coverage limits, expiration dates, and the named insured directly from the uploaded certificate and validates them against your rules, with no manual data entry.
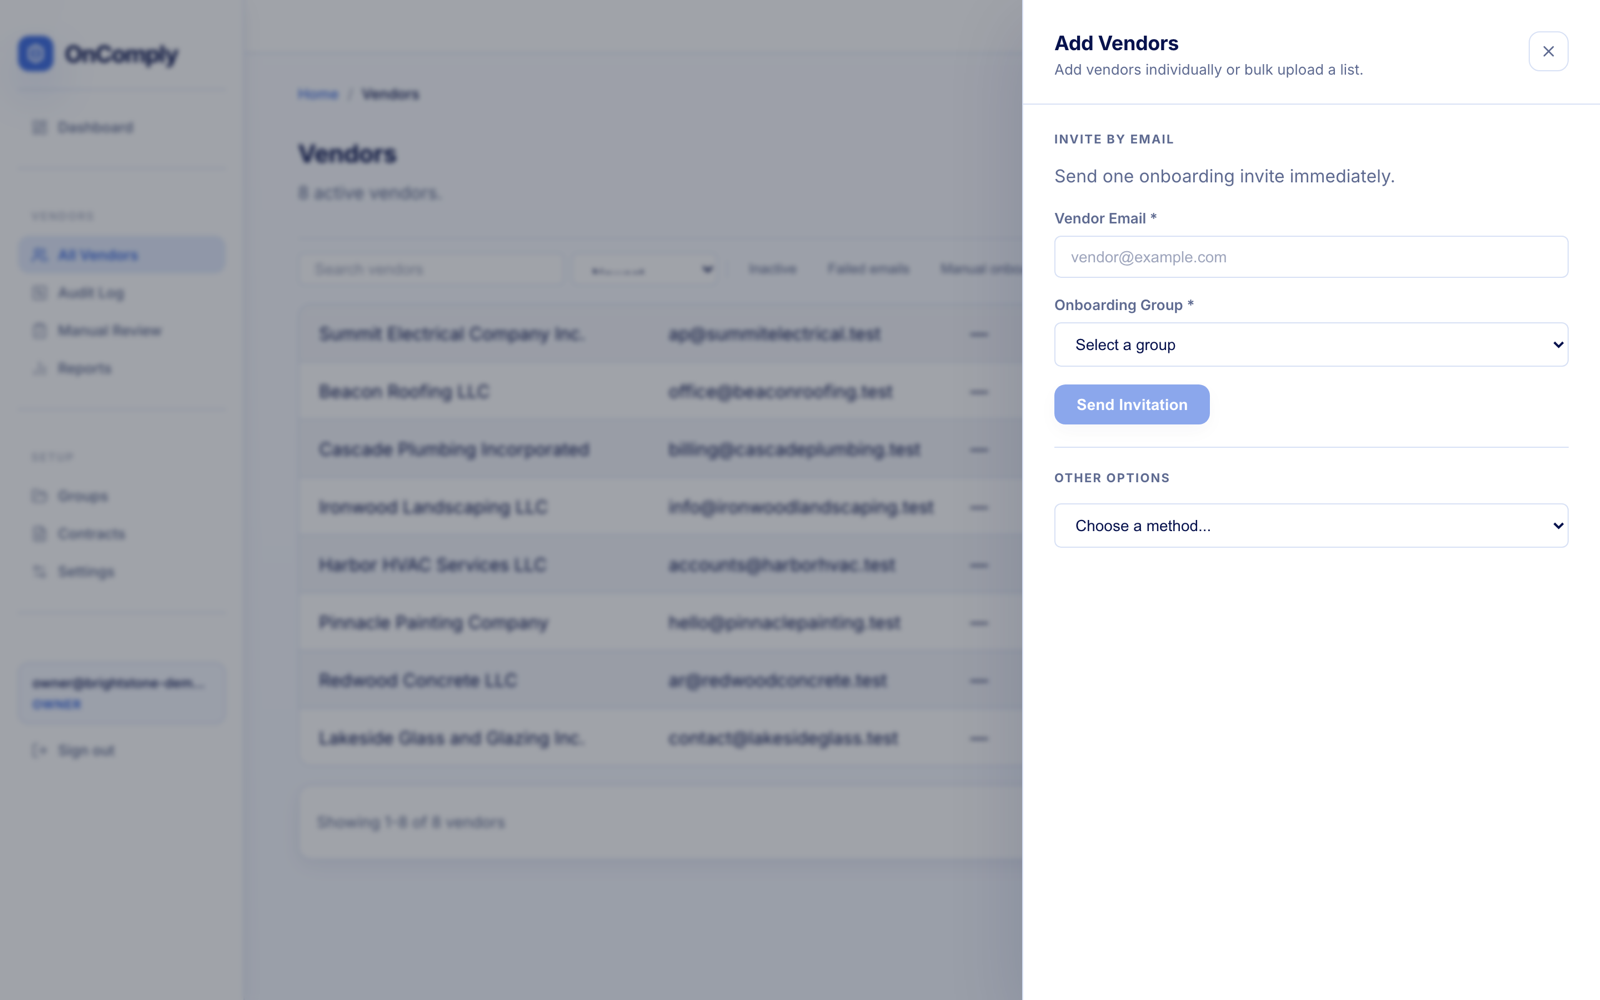
Add your vendors three ways
From the Vendors page, open Add Vendors. Vendors never create an account. Each invitation contains a secure link that signs them straight into the vendor portal.
Invite by email
Send one onboarding invite immediately: enter the vendor's email, pick their onboarding group, and click Send Invitation.
Manual entry
Create a vendor without sending an email: enter their details, then click Create And Open Portal to complete the portal on the vendor's behalf. The record is flagged as manual onboarding.
Bulk upload
Upload a .csv or .txt file with one email per line (or a CSV column named “email”), choose the onboarding group, and OnComply sends every invitation for you.
Sync from QuickBooks Online
With the QuickBooks integration connected, import your existing vendor list directly and invite from there. You can resend any invitation later from the vendor's Actions panel.
What your vendors see
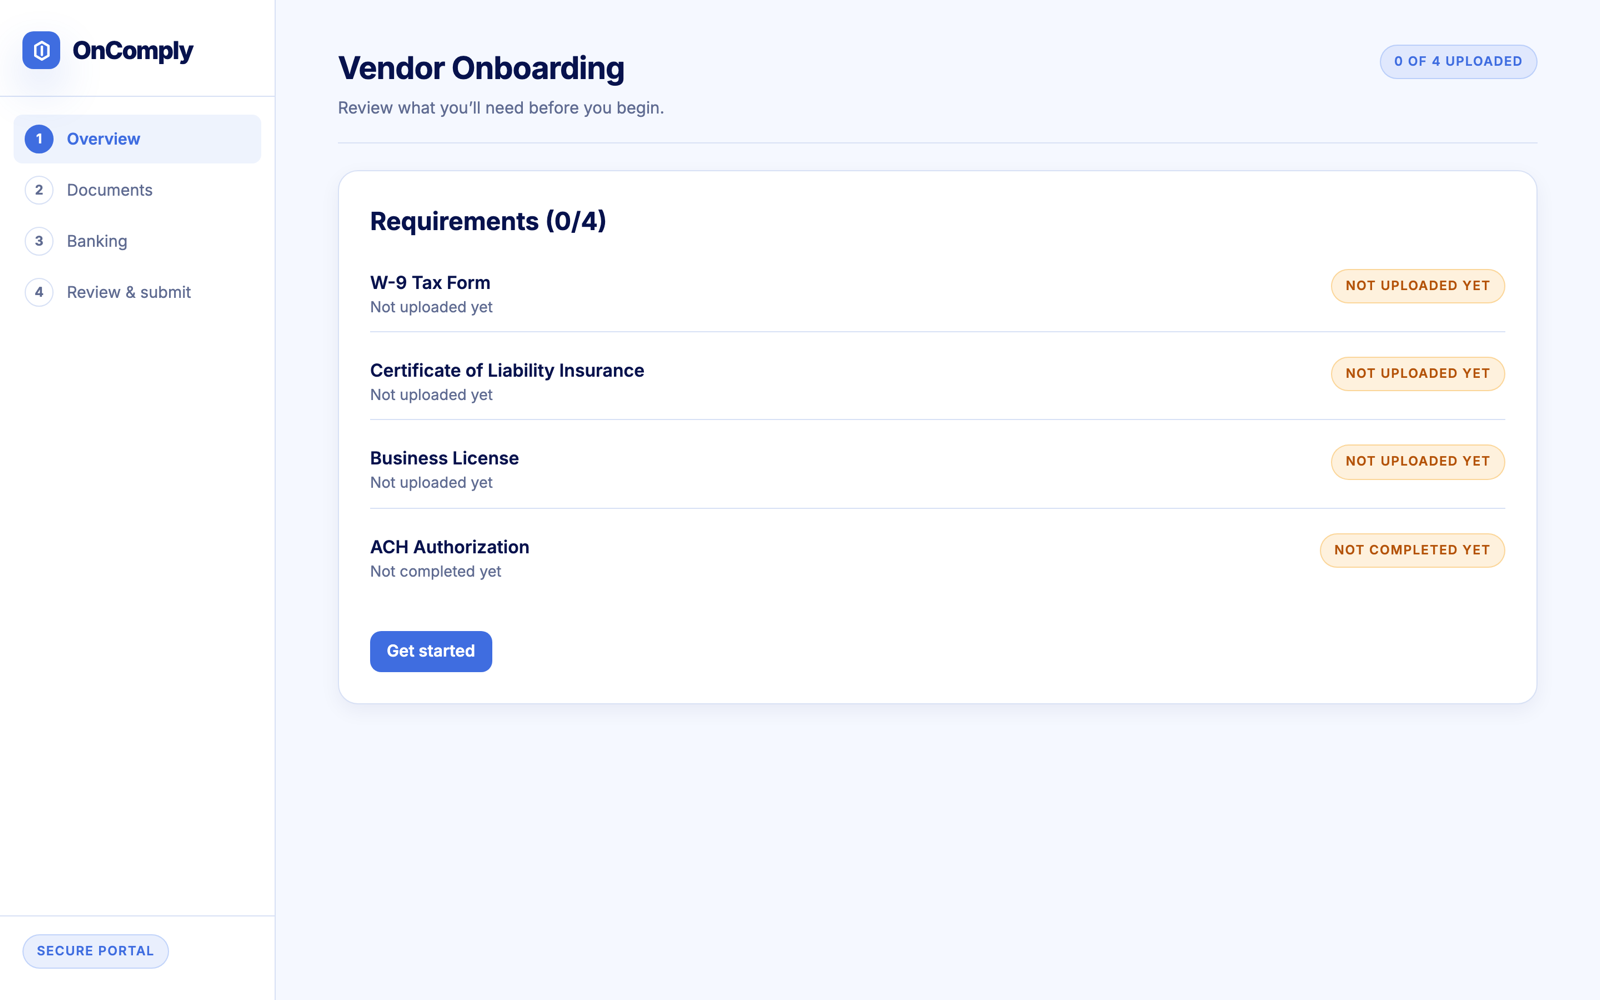
Vendors click the secure link in their invitation email. No password, no account. The portal shows only the steps their onboarding group requires, on desktop or mobile.
Overview
The vendor sees every requirement with a status badge and a progress count, then clicks Get Started to jump to the first incomplete step.
Basic info & documents
They confirm business details (with optional TIN verification), then upload each required document. Files upload securely with a progress bar and instant confirmation.
Banking & contract
If required, they authorize ACH payments (bank account details plus an optional voided-check photo) and fill and sign your contract electronically with ESIGN/UETA consent.
Review & submit
A final review screen lists everything uploaded. The vendor accepts your terms and clicks Submit for Review. From there, OnComply finishes validation in the background and your team is notified of anything needing manual review.
Review documents and stay compliant
After submission, OnComply validates every document automatically and computes each vendor's eligibility: Compliant, Pending, Blocked from Work, or Blocked from Payment. Your job is just the exceptions.
Work the Manual Review Queue
Documents the automated checks can't confidently validate land in the Manual Review Queue. Pass a document and the vendor's status updates with no email sent; fail it and OnComply requests a replacement from the vendor automatically.
Watch the dashboard
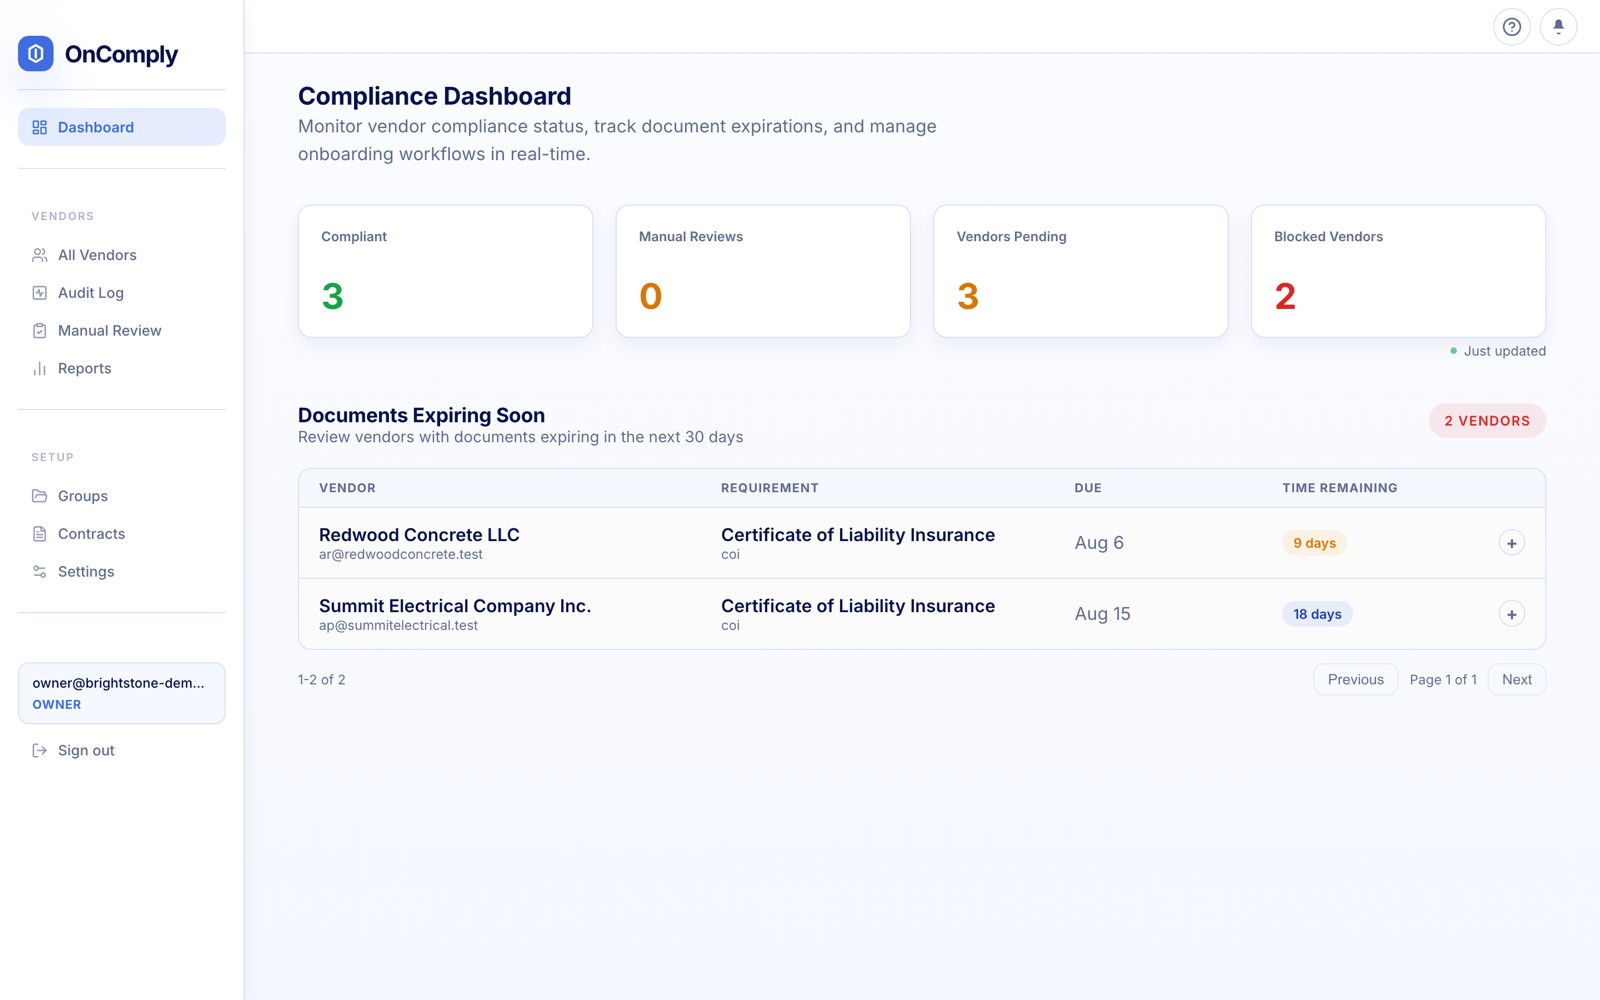
The Compliance Dashboard shows Compliant, Manual Reviews, Vendors Pending, and Blocked Vendors at a glance, plus documents expiring soon. The notification bell alerts you when a vendor's status changes.
Let renewals run themselves
As documents approach expiration, vendors automatically receive reminders 30, 14, and 7 days out with a scoped renewal link showing only what needs updating. You can also generate a renewal link manually from any vendor record.
Report and audit
Reports show your compliance distribution, requirement funnel, and upcoming expirations. The Tenant Audit Log records every action across users, vendor lifecycle, and system notifications, and everything can be exported.
Common questions
A vendor says their link doesn't work
Invitation links expire for security. Open the vendor's record, then use Actions → Resend Invitation to send a fresh link. The vendor should open the newest email and click the link directly rather than copying it.
An invitation email never arrived
Check the Failed Email Sends panel under Settings → Support, and ask the vendor to check spam. Vendor records with delivery problems are flagged in the Vendors list under the Failed Emails filter.
You're locked out of workspace actions
If you see “Verify your email to unlock workspace actions,” complete email verification first. A 6-digit code is sent to your address. If your trial has ended, the account owner can choose a plan to restore access immediately.
You need help from OnComply
Open Settings → Support to see the setup checklist, the getting-started guide, and the support workspace where you can open a ticket.
Ready to set up your workspace?
Start your 14-day free trial. No credit card required. Building an integration instead? The developer reference covers the full API and webhooks.